After some careful consideration I’m consolidating my food blog with this one. I’ll be adding a category under food for recipes and tagging actual recipes to it. I’d always been keen on splitting out the different sites (e.g. food/recipes, tech, movies, document site) but I’m going to try to consolidate except for the tech site, that one has more than enough content to warrant it’s own iteration of word press. So stay tuned for the good eats!
Author: aron
-
Cowboys Season is Over
You know I’m not much of a sports fan these days. I mean I hold nothing against them and I really enjoy having live sports on, maybe it’s the pandemic but it feels normal even if there isn’t anyone in the stands. Now don’t get me wrong, I’m a Cowboy’s fan just because I was born and raised here but I’m not about to stand idly by without laughing hysterically at Jerry Jones and his coaching follies. Today’s major blow coaching call was a non-challenge decision on something pretty much everyone agreed would have been over turned.
I do hate they are consistent losers but it does lend credence to my theory on the Jimmy Johnson curse. Jimmy Jones was such a prick when they won the Superbowl the last time with Jimmy Johnson that he will never have another trophy until he leaves the team to someone else. We shall see if this is the case but so far they’re doing a great job of proving me right.
-
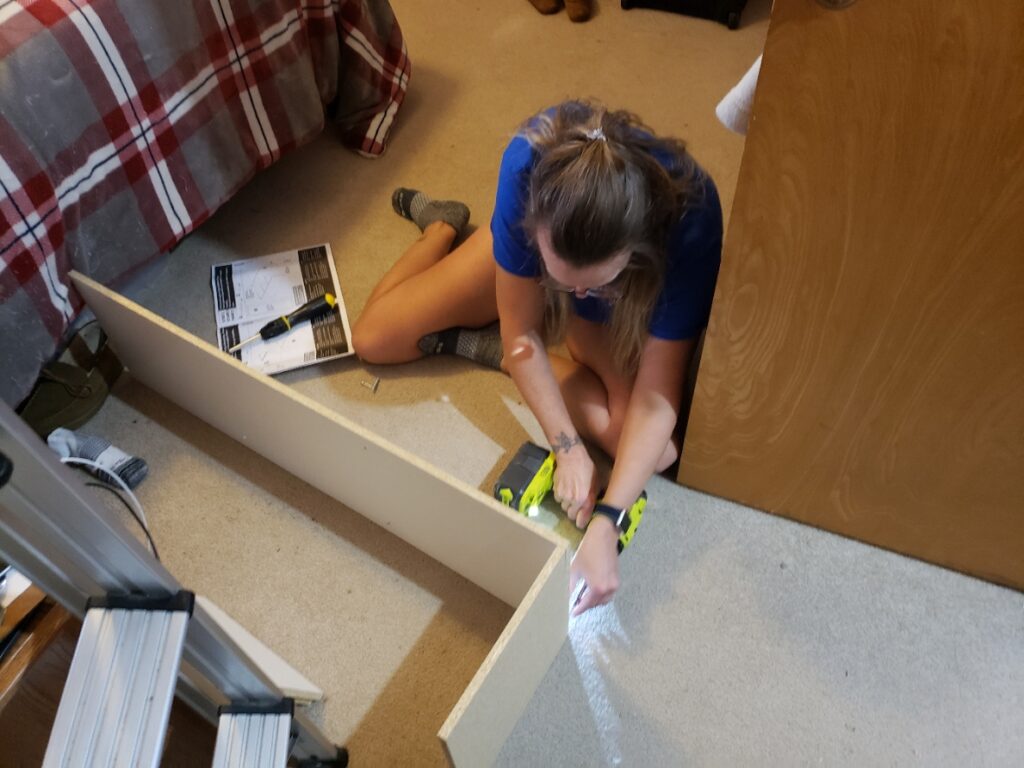
Lazy Study Day
So it was statistics and hanging around today. A good way to spend the fist Saturday of the year. Sandy and I took a two mile walk in the afternoon south of Pipeline, I make my steps for every day this year! Both of them. Dinner was the teriyaki pork chops with baked potatoes and corn. I also got the framing and roofing nail guns along with assorted other tools from Harbor Freight, I could have bought the pieces one at a time for 25% off with coupon but I want to get this underway. So they have a bit more of my money but I have my tools:)
-
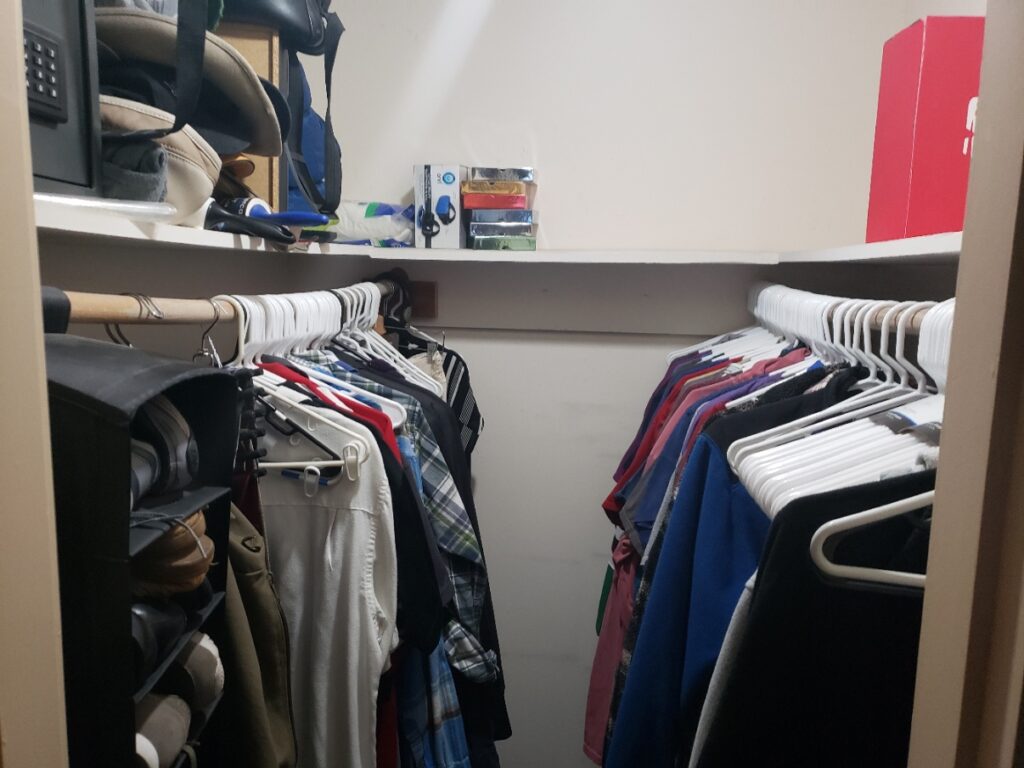
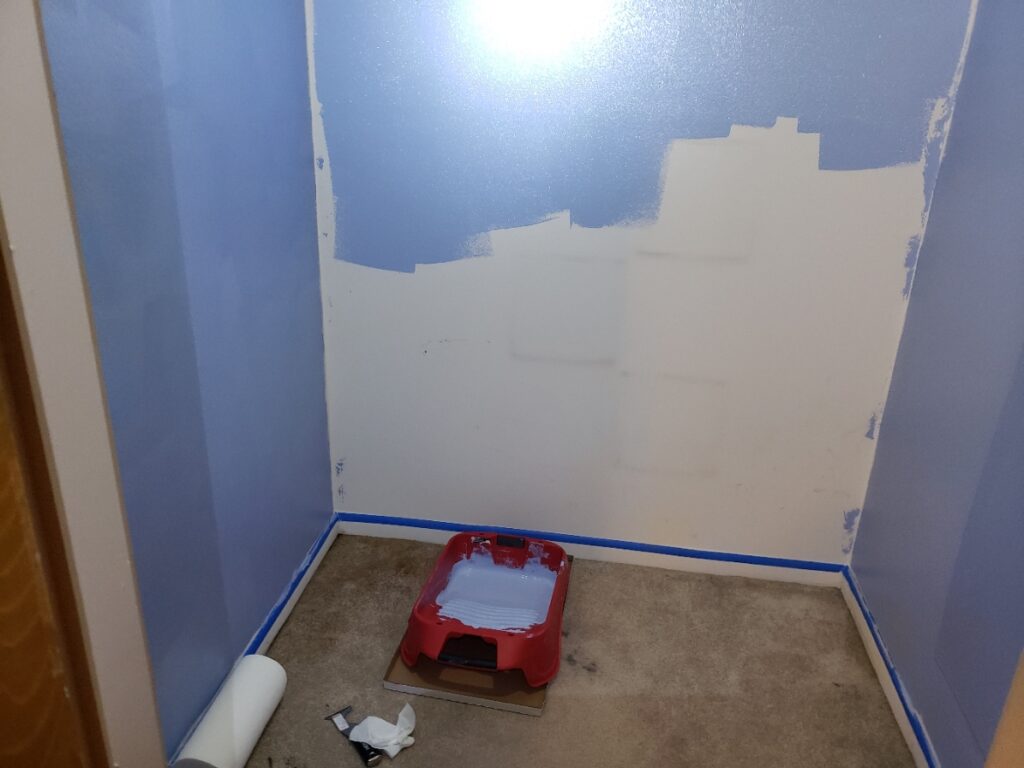
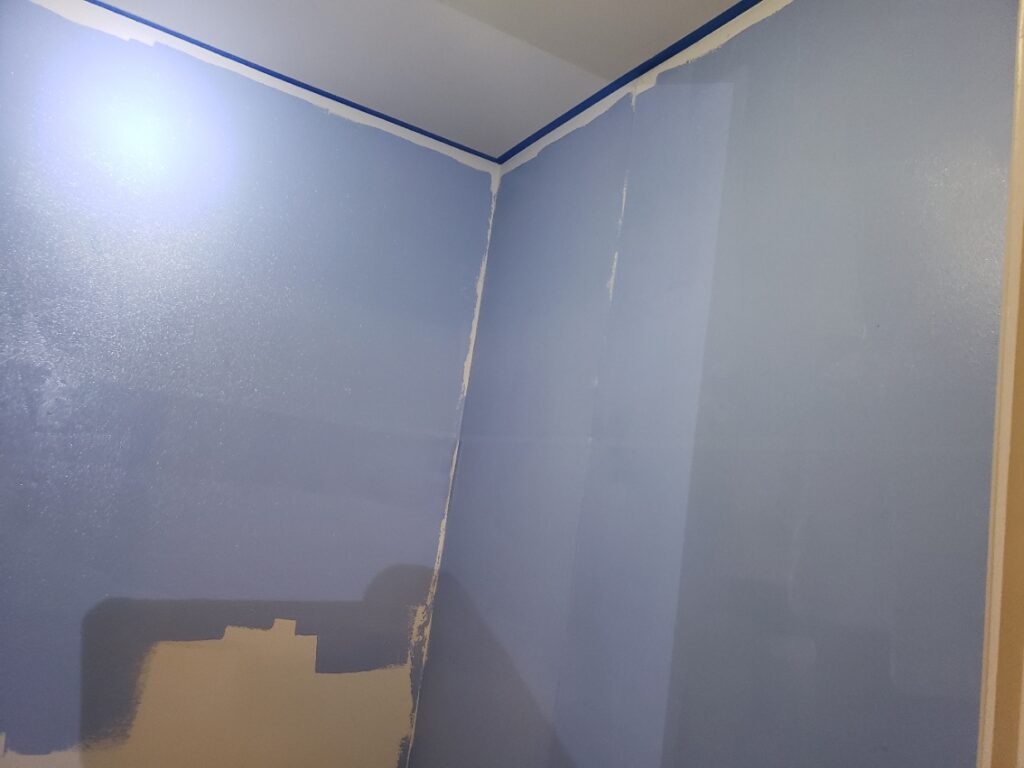
Sandy’s Turn
So I painted and did my side of the closet, I made my better half do the other side. I do believe it took her longer to do her side than it did me the whole thing but it’s almost done.
-
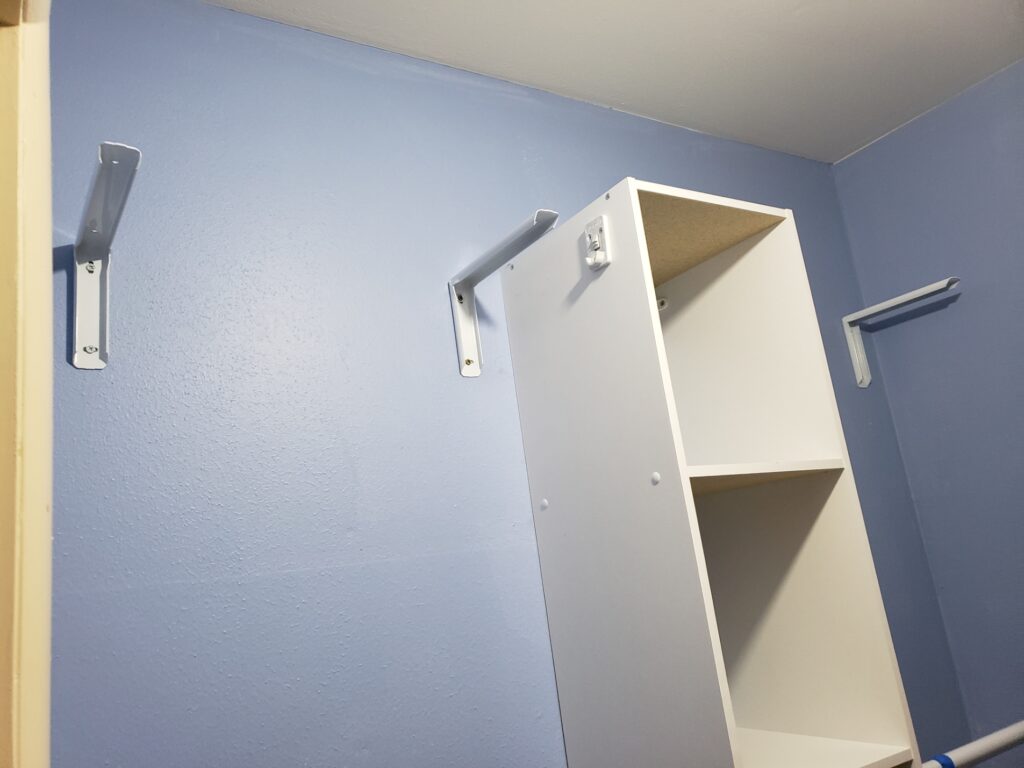
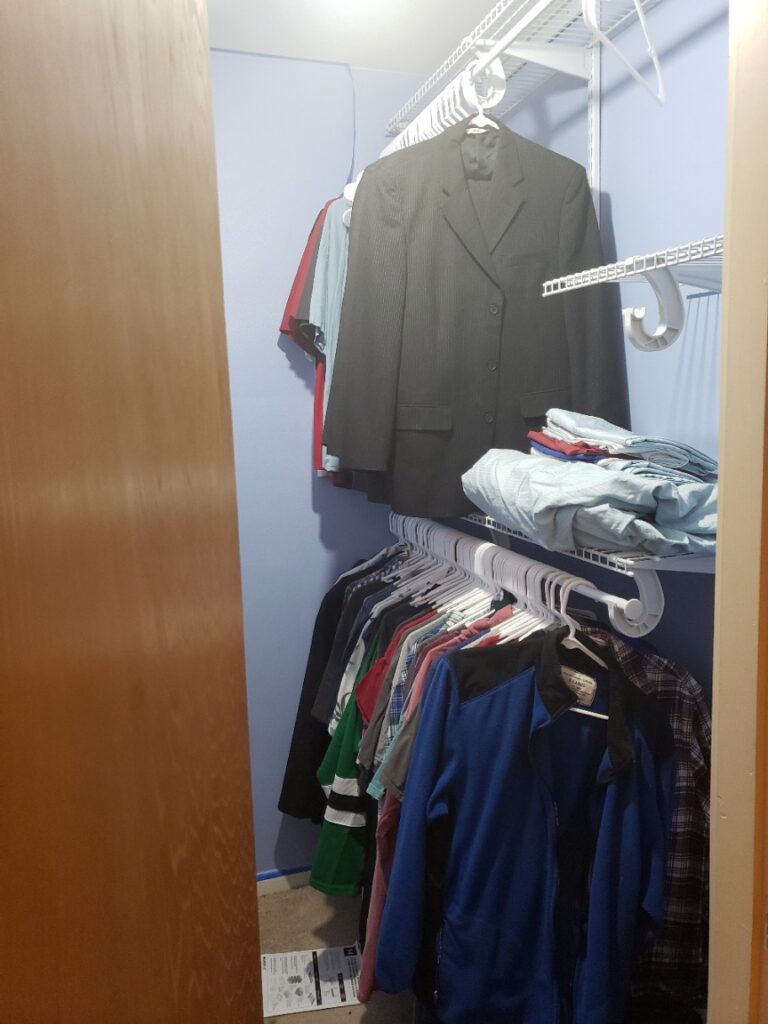
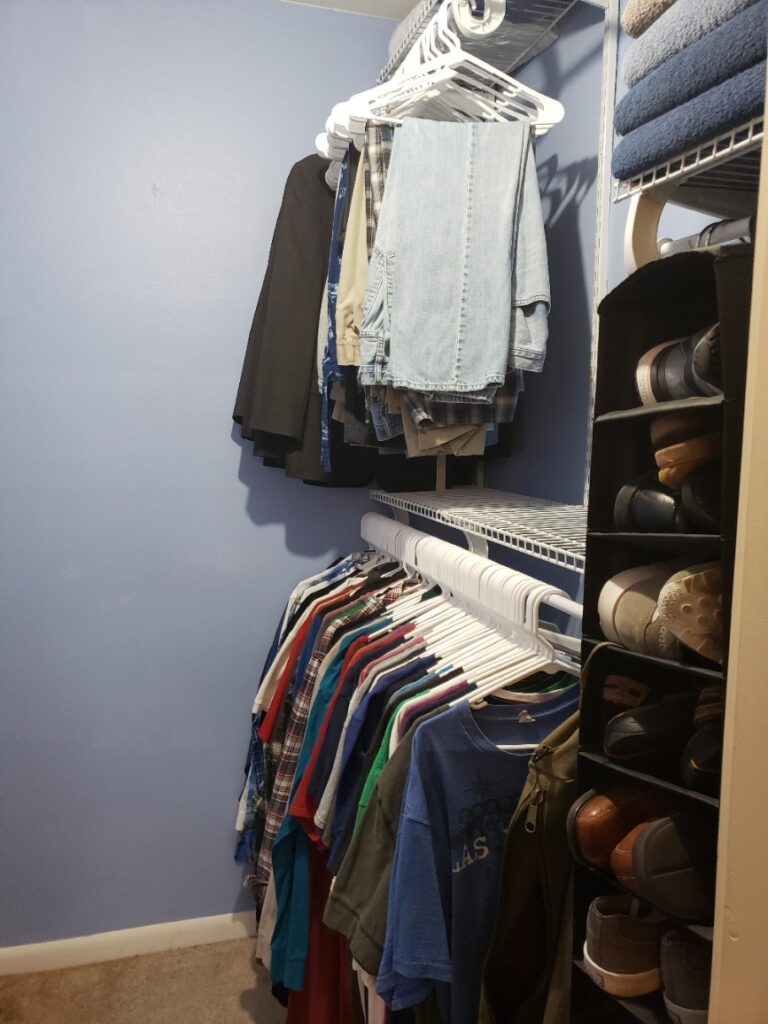
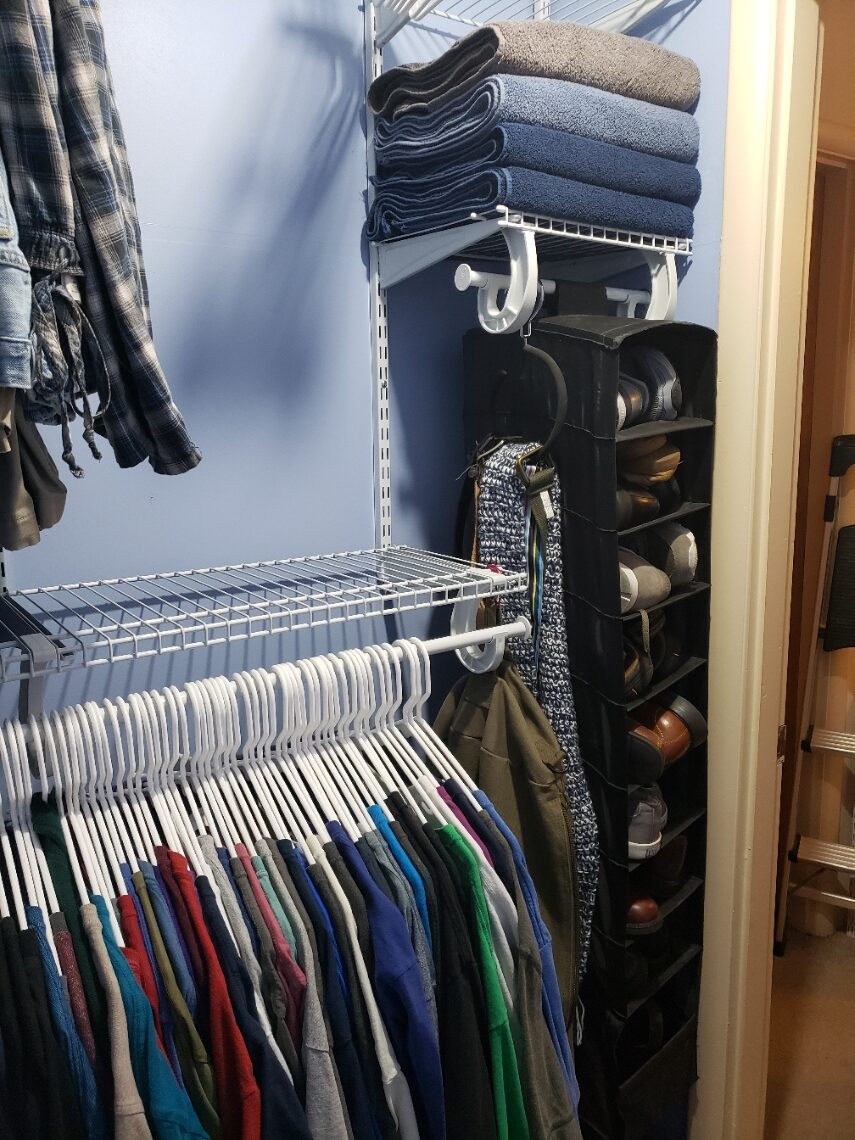
Happy New Year – New Closet
Well we’ve finally made it down to last day of this insane and surreal year. 2020 could not end soon enough and it finally has. So there are no parties, no gatherings, what to do with the evening? I know! Let’s redo the closet in the master bedroom!!!
So that’s what I did for new years eve, I had the paint, sanders, take down equipment, spackle and most importantly a closet organizer I order a year ago.
Happy to say I’ve got it complete and the clothes were actually hung back up by the time I went to bed. -
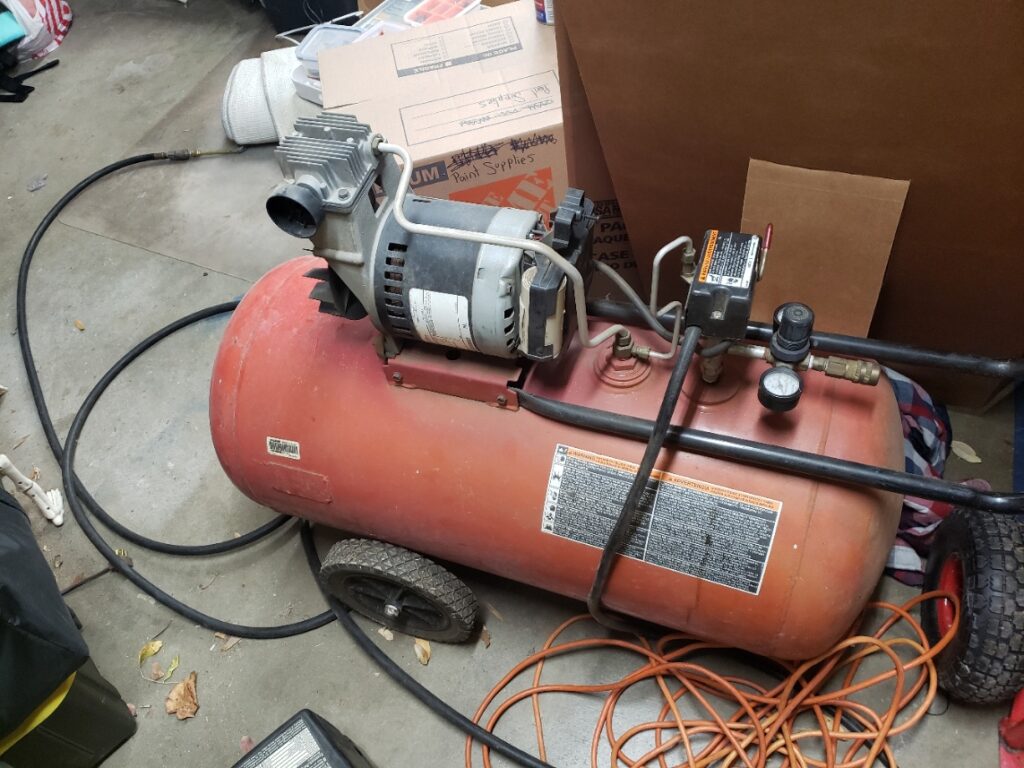
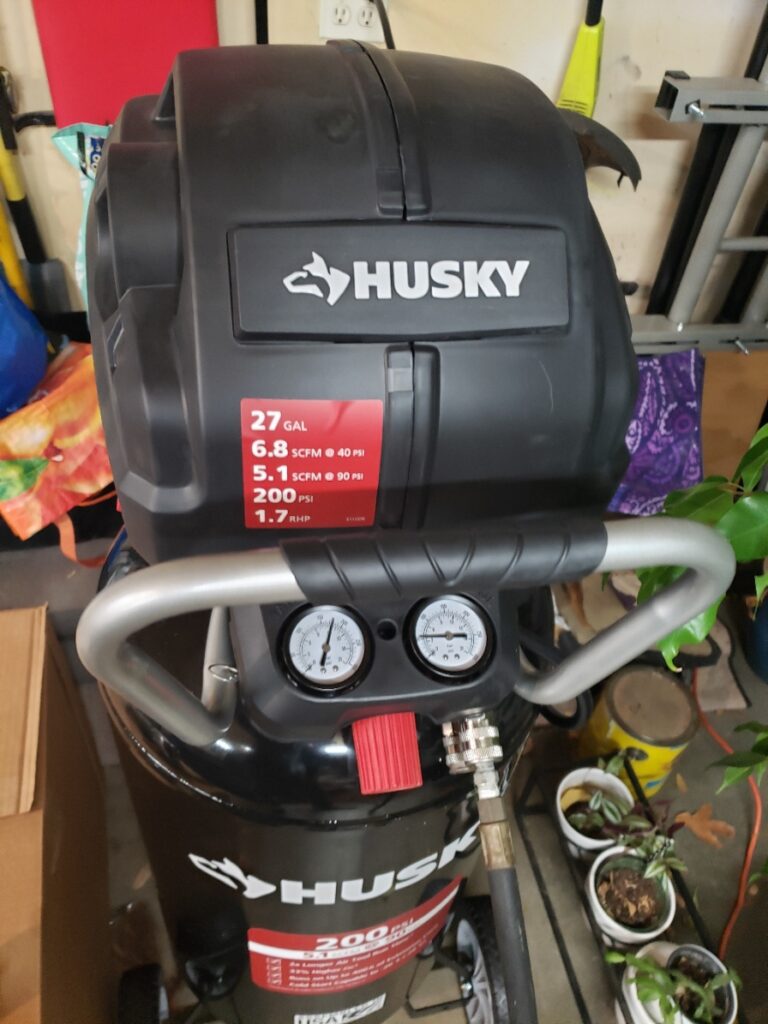
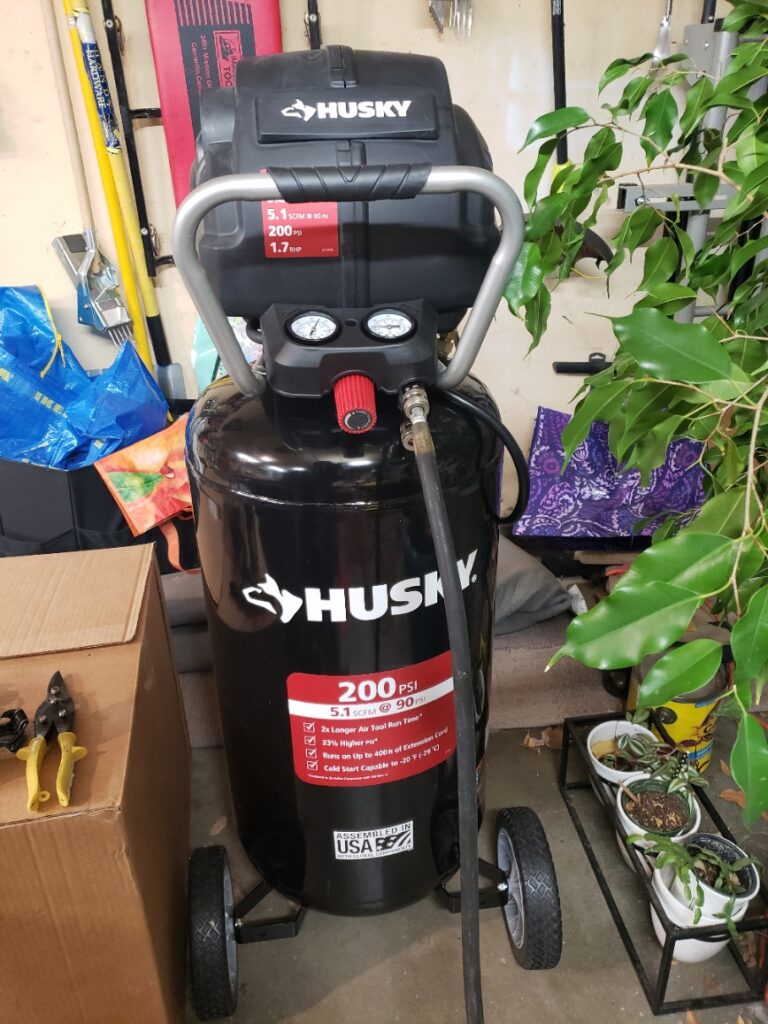
Replacement Air Compressor
So with the impending build of the shed imminent, it’s time to procure the tools to get er done. While my Craftsman 30 gallon compressor has served me well for many years (close to 20 I believe), it looks like the motor has given out, they don’t make the motor anymore and Craftsman and Sears are about as dead as the motor. So it’s time to upgrade. I needed something that takes up less space (upright) and I found it in the Husky C271H. $358 at Home Depot, it’s 5.1 CSFM @ 90PSI so should be good for the framing, inflating and roofing needs I have. It’ll run my impact guns and air ratchets, maybe a little light for sanding and such but that’s not what I’m needing it for. I need to buy the nail guns but I think this fits the bill for a home construction tool.
-
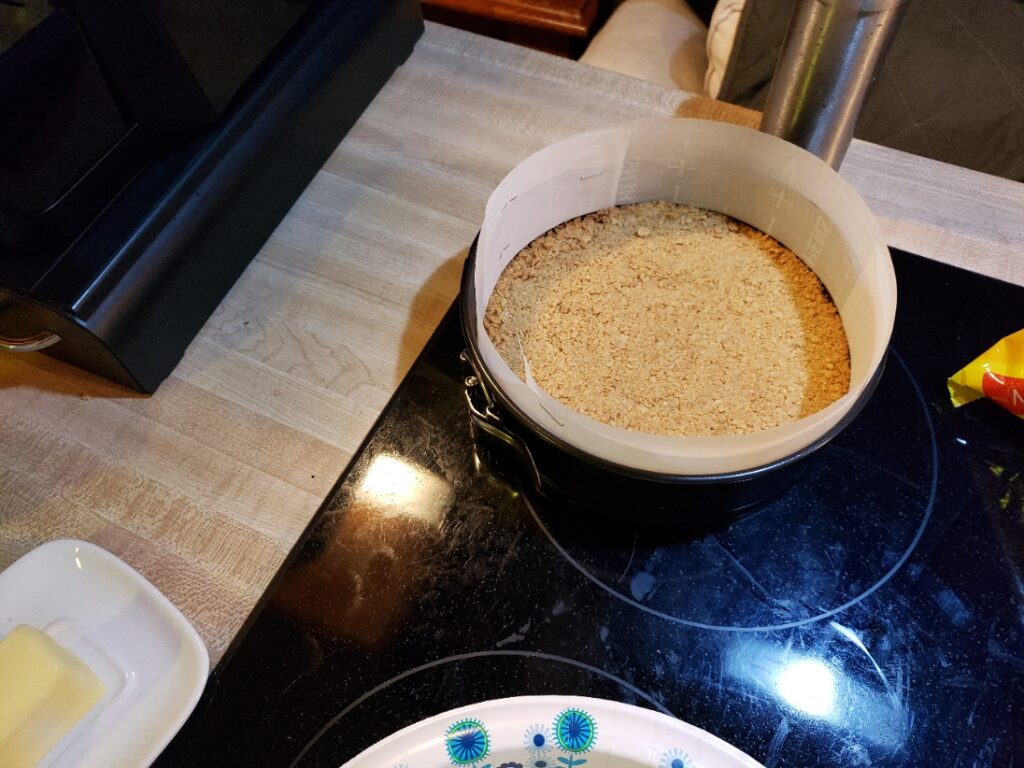
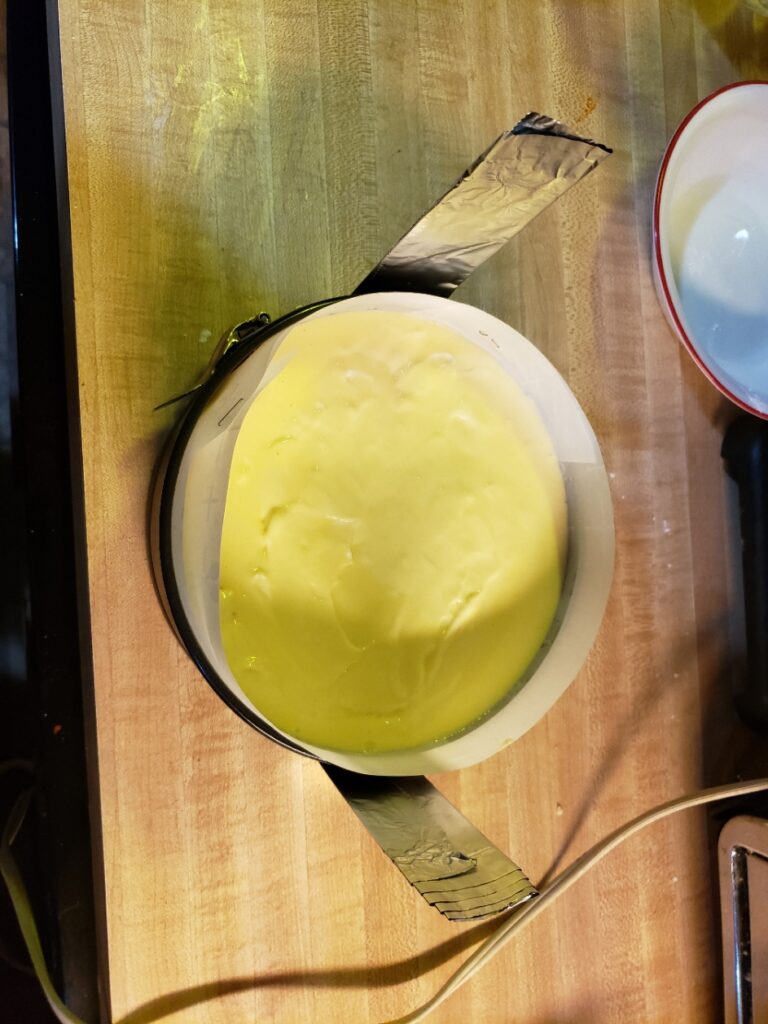
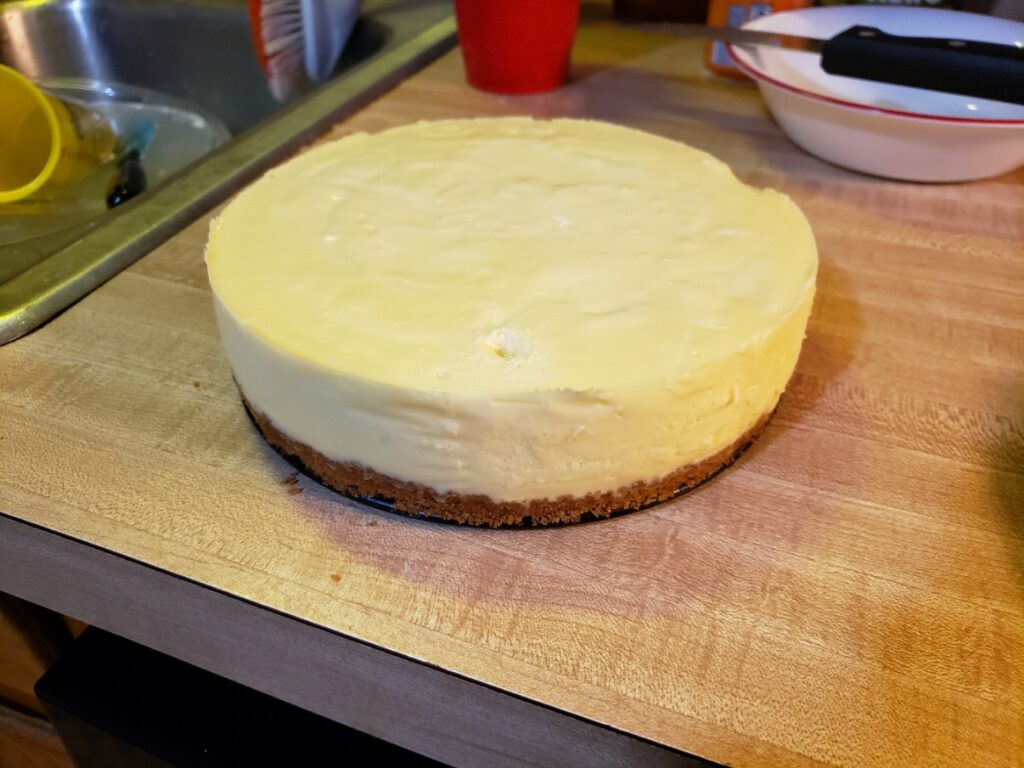
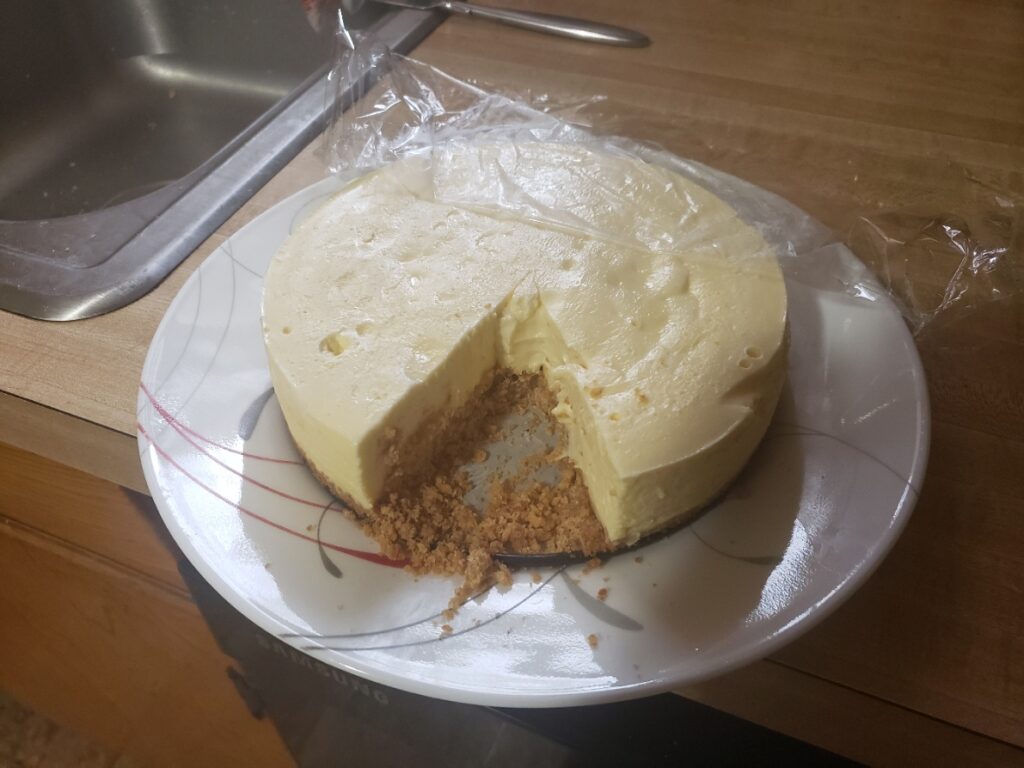
Instant Pot Cheesecake
So since I was a kid I’ve loved the tangy sweet delight that’s known as cheesecake. Mom used to make a cheesecake for the Octoberfest at TCCC, I was 8??? In any case I’ve always loved it but making it seemed a daunting and downright impossible task. Even Alton’s episode left me despondent that it was just downright too hard to make. Fast forward to the current. When I bought my instant pot, I got an accessory kit that had a steamer basket, egg holder, fridge magnets with times and oddly enough a spring form pan. I knew this was the tool for cheesecake but in an instant pot???
Turns out the answer is emphatically yes. The steam is the perfect way to cook cheesecake and the pressure doesn’t hurt either. I found this recipe which I’ll shamelessly copy for my food blog shortly. Give it a shot, it’s well worth the effort.
-
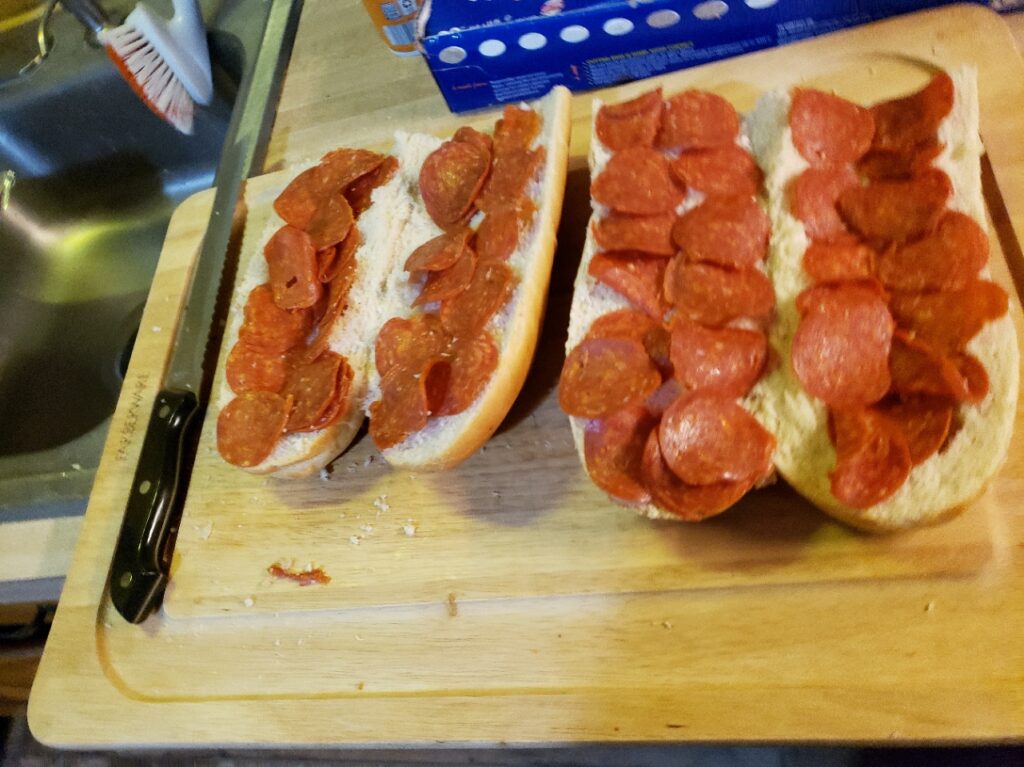
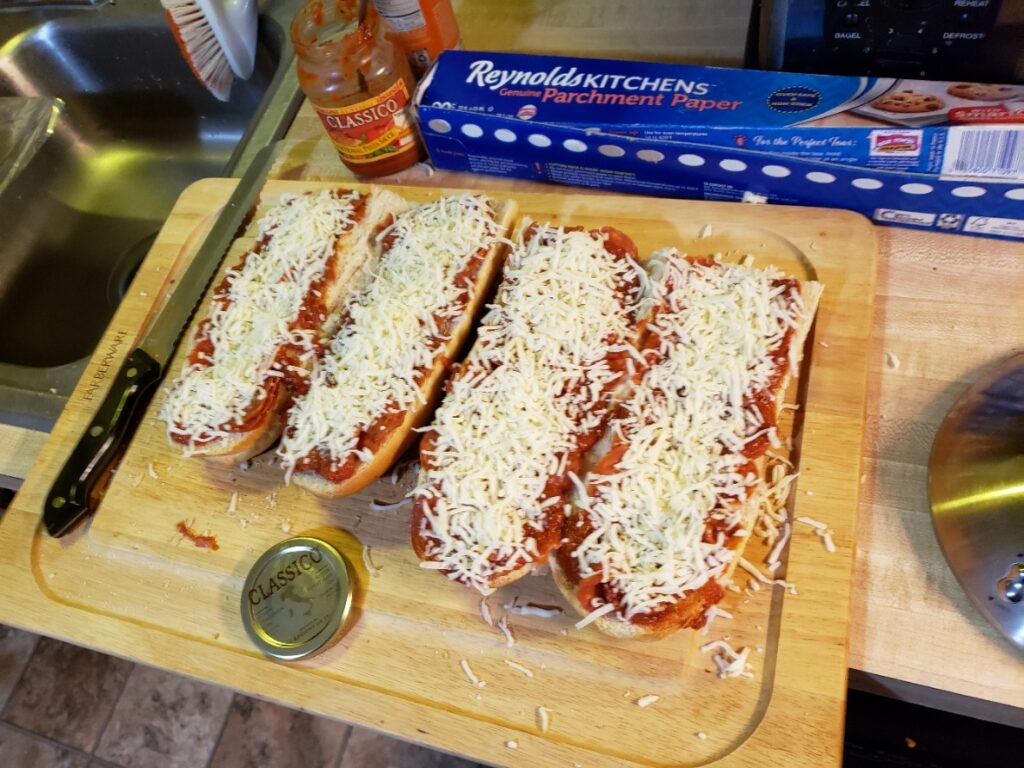
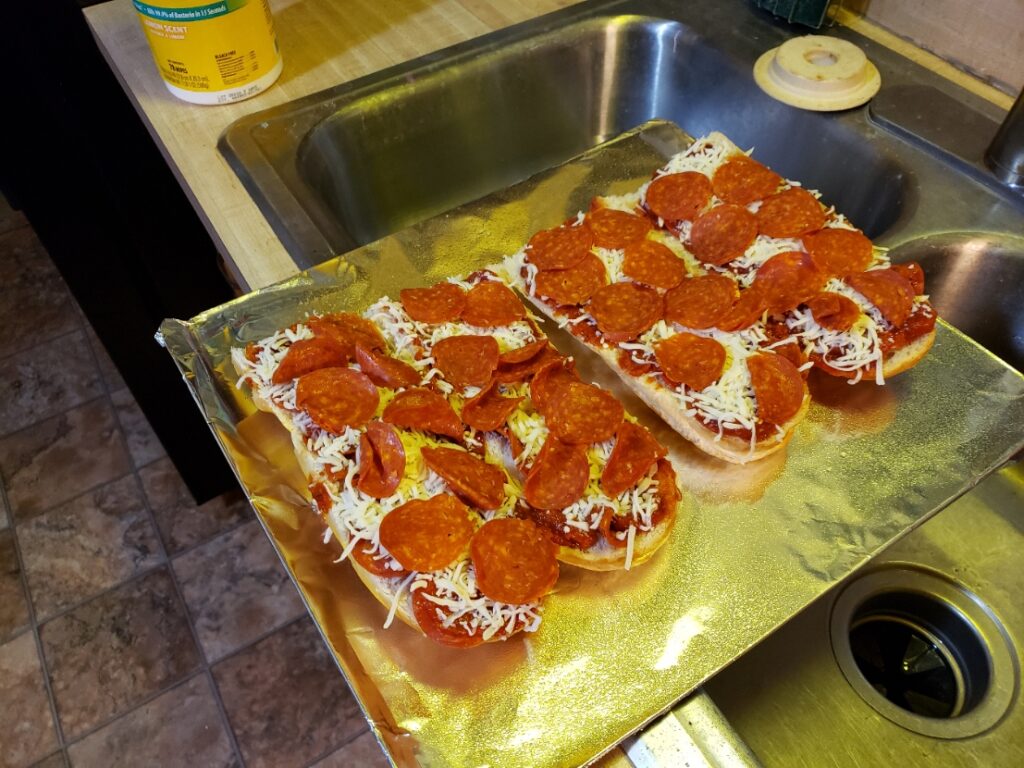
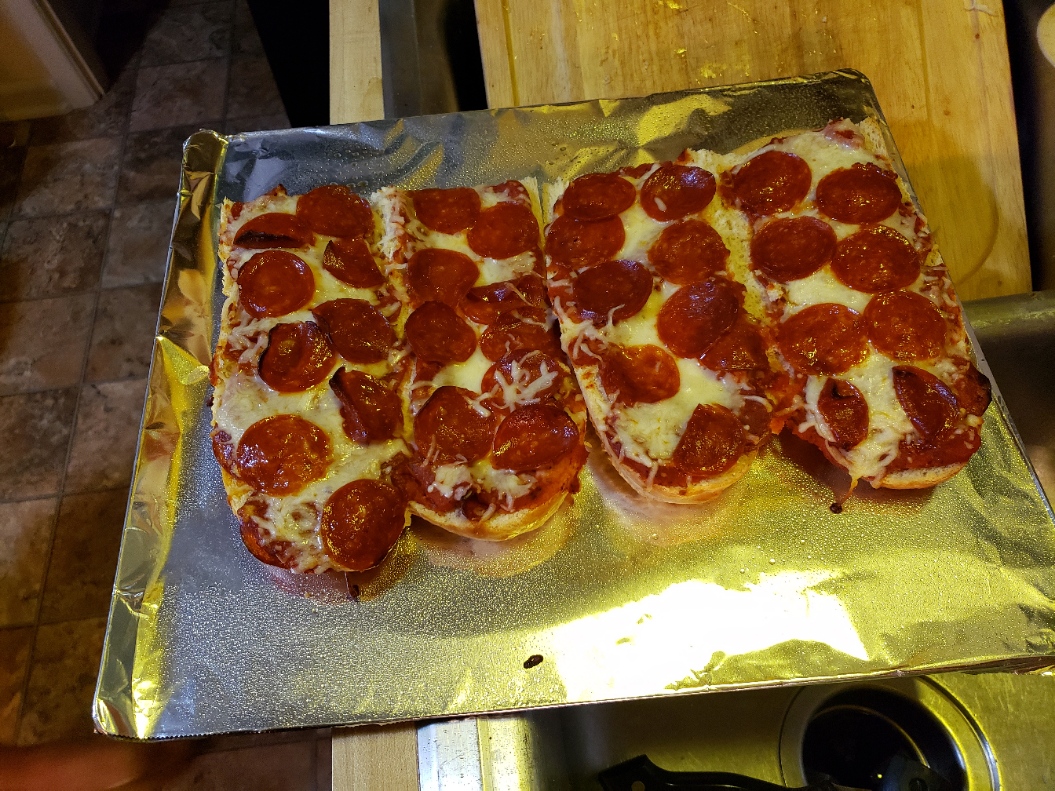
Pizza Subs
So having done time in Erie, PA, I’ve developed a taste for pizza subs. Now you’d think this would be an easy order to fill. Any place with sub rolls and pizza fixings should be able to build this, or so you would think. But alas there’s no one willing to do this. There was one place I found down here (Dino’s) that used to have it on the menu, while it lacked a je ne sais quoi that was found in abundance at any hole in the wall Italian place in Erie, it did pass the bar and fit the need. But they stopped making them, when they said they no longer had it on the menu I asked them what they didn’t have, it stymied the order taker and I gave up. But you can make them on your own and here’s the proof:
-
Leaf Clean Up
Well today was good day, it started off well enough, I pulled out the leaf vac and was cleaning up the front beds, watered the shrubs and then spiked them with a fertilizer spike. They’re beginning to come in pretty good but heck they’ve been in there for 4 years now. Some slight drama at the kids place but things seem to have worked themselves out for now. Couldn’t have asked for a better day weather wise and the Cowboys got a real win. Not bad for a Sunday!
-
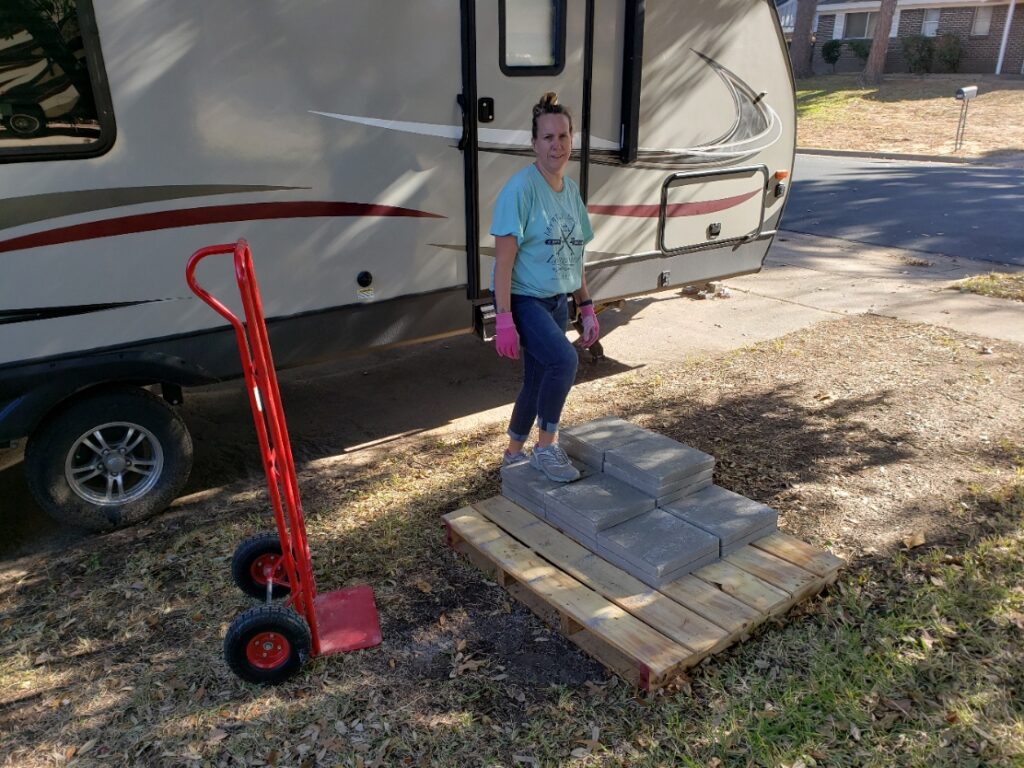
Pavers 1st Move Finished!!!
So the pavers are complete, a scant 2 weeks after they were dropped off. Oh well, it was never about speed, this is a slow progress but high quality. So now that we have the back yard work area ready, the next steps are, repair air compressor, order tools, order materials, build. Stay tuned for progress as it becomes available.